Posted on: October 25, 2016
By: Alan O'Neill
Posted in: Ceiling Fans, Electrician
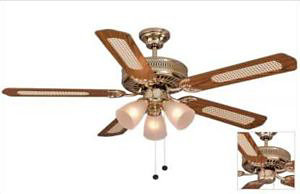
The main features of a ceiling fan is to move the entire air in the room, not creating a local wind as in other fans. Whether you are trying to keep your hose cooler or warm it up a ceiling fan can do both consistently. Installing a ceiling fan is a simple and economical way to improve the heating and cooling efficiency of your home. A wide variety of fan features, combined with the condition of your installation site will help determine the cost of your project. Consider both the fan fixture and its intended location to understand what contributes to the overall cost. If you plan to install your new ceiling fan in the same location as an existing light fixture, some consideration must be given to the site. In most cases, the current wiring will be adequate for your new fan, but any necessary upgrades your electrician makes will add to the cost of the project. Also, since ceiling fans are generally heavier than light fixtures, your electrician must ensure that the electrical box mounted inside your ceiling is able to support the added weight of your new fan.
Installation varies from fan to fan, so be sure to follow the manufacturer’s instructions.
That cool summer breeze passing by as you take an afternoon nap on your sofa should be enough convincing for you to get a ceiling fan. A cooler, brighter home, with reduced energy costs is something I think we can all get behind. Used in conjunction with an air conditioner, having a circulating fan helps to spread the cool air around, making it even more effective. Installing a new ceiling fan into an existing light fixture is a fairly easy DIY project that typically takes less than half a day to complete.
Check your local building codes to find out if you’ll need a permit or an electrical inspection before beginning the project. Once you have the OK to proceed, locate an overhead light fixture in the room where you’d like to install the fan. If there isn’t an existing fixture, we suggest to call a licensed electrician and have one installed, as the job will require extensive electrical knowledge.
Once you’ve made all the necessary measurements and chosen a fan, it’s time to begin the installation. Review the instructions that came with your fan to be sure you have all the parts and tools you’ll need. Tools for the job typically include:
To determine what size of fan will be the most efficient for your space, measure the square footage of your room. For rooms measuring up to 75 square feet, you’ll want to install a fan that’s 36 inches in diameter or smaller. Between 75 and 144 square feet, choose a fan in the 36 to 42 inch range. For spaces measuring 144 to 224 square feet, look for fans in the 50 to 54 inch range. Larger rooms may need fans with as much as a 72 inch blade span.
Next, measure the area directly around the fixture. There should be at least 30 inches of clearance between the tips of the fan blades and the walls. So, if you are installing a 36-inch diameter ceiling fan, the center of the unit should be a minimum of 66 inches from the nearest wall. Measure the height, as well. The bottom of the fan should hang at least 7 feet from the floor. Check your fan’s instruction manual to see if there are any additional details about ceiling height or blade clearance.
You don’t want any “shocking” surprises when working with electrical wiring, so the first step is to turn off the power at the breaker box. Locate the switch that controls power to the room you’re working in and flip it to the off position. It’s wise to notify the rest of the household that you are doing this, as well as post a warning on the door of the breaker box.
Ceiling fans can be quite heavy, with some weighing up to 50 pounds, and they need solid internal support. This support is usually achieved with an extendable metal fan brace. Many fan kits include this brace. If yours doesn’t, purchase a brace that is rated for the weight of your fan. You’ll also need a U-bolt bracket that fits over the center of the brace, and the appropriate mounting bolts for attaching the junction box.
Extendable braces consist of a square metal tube with a rotating internal mechanism that extends two spiked feet.
You’re almost there! Ceiling fan kits usually come with a fan mounting bracket. This bracket has a circular divot which holds the ball mount at the end of the fan’s downrod. The mounting bracket will attach to the junction box either by clipping into or sliding over the box’s mounting bolts. Check the instructions to see how your bracket should be attached. Read more here.
Installing ceiling fan is the best solution to save the electricity bill in your house. While ceiling fan installation is not the most complex electrical process, it is still important to contact your Houston area professionals to ensure each step of the process is followed safely and precisely. This is why ceiling fan installation is a popular home improvement project for many people here in Houston Texas, especially with our hot, humid summers. Electrical, ceiling fan installation is one of the most popular services we provide in the Houston area. Call (713) 812-7070 us for your home service and repair needs.
For more related articles and info visit Blog.
Open Including Holidays
ALAN O’NEILL M-20628 | TACLA135747C | TECL 30557
© 2025 Abacus Plumbing, Air Conditioning & Electrical. All Rights Reserved